A minimum viable intro to NSDiffableDataSource, Composable Layouts and UICollectionViews
At WWDC 2019, Apple introduced the UICollectionViewComposableLayout and NSDiffableDataSource classes, and working with collection views suddenly got almost ridiculously easy.
Composable layouts allow you to build up complex layouts based on simple component parts - they take care of much of the heavy lifting of calculating layout parameters, as well as managing insertion and deletions of items.
The diffable data sources makes generating the underlying data just as painless. They follow a diffing process that will be familiar from tools like Git - make some changes, compare the result of the changes to the original data set, and the deltas are calculated and applied automatically.
This is a worked example of getting a collection view wired up to work with a compositionable layout and a diffable data source. It’s pretty much the minimum-viable version of a collection view, so it should be a useful base for more elaborate projects.
We’ll create a UICollectionViewComposableLayout to generate a simple grid, and use NSDiffableDataSource to filter the data set and apply animated changes to the collection view.
The project can be broken down into 4 stages:
- setting up the UI - adding a
UICollectionViewin a Storyboard, and wiring up some buttons so that we can manipulate the data to see the effect of the diffing mechanism - creating a compositional layout using
UICollectionViewCompositionalLayout - setting up some data to display in a
NSDiffableDataSourceSnapshot, and feeding that initial set to the collection view - adding functions to manipulate the underlying data, and feed that back to the collection view
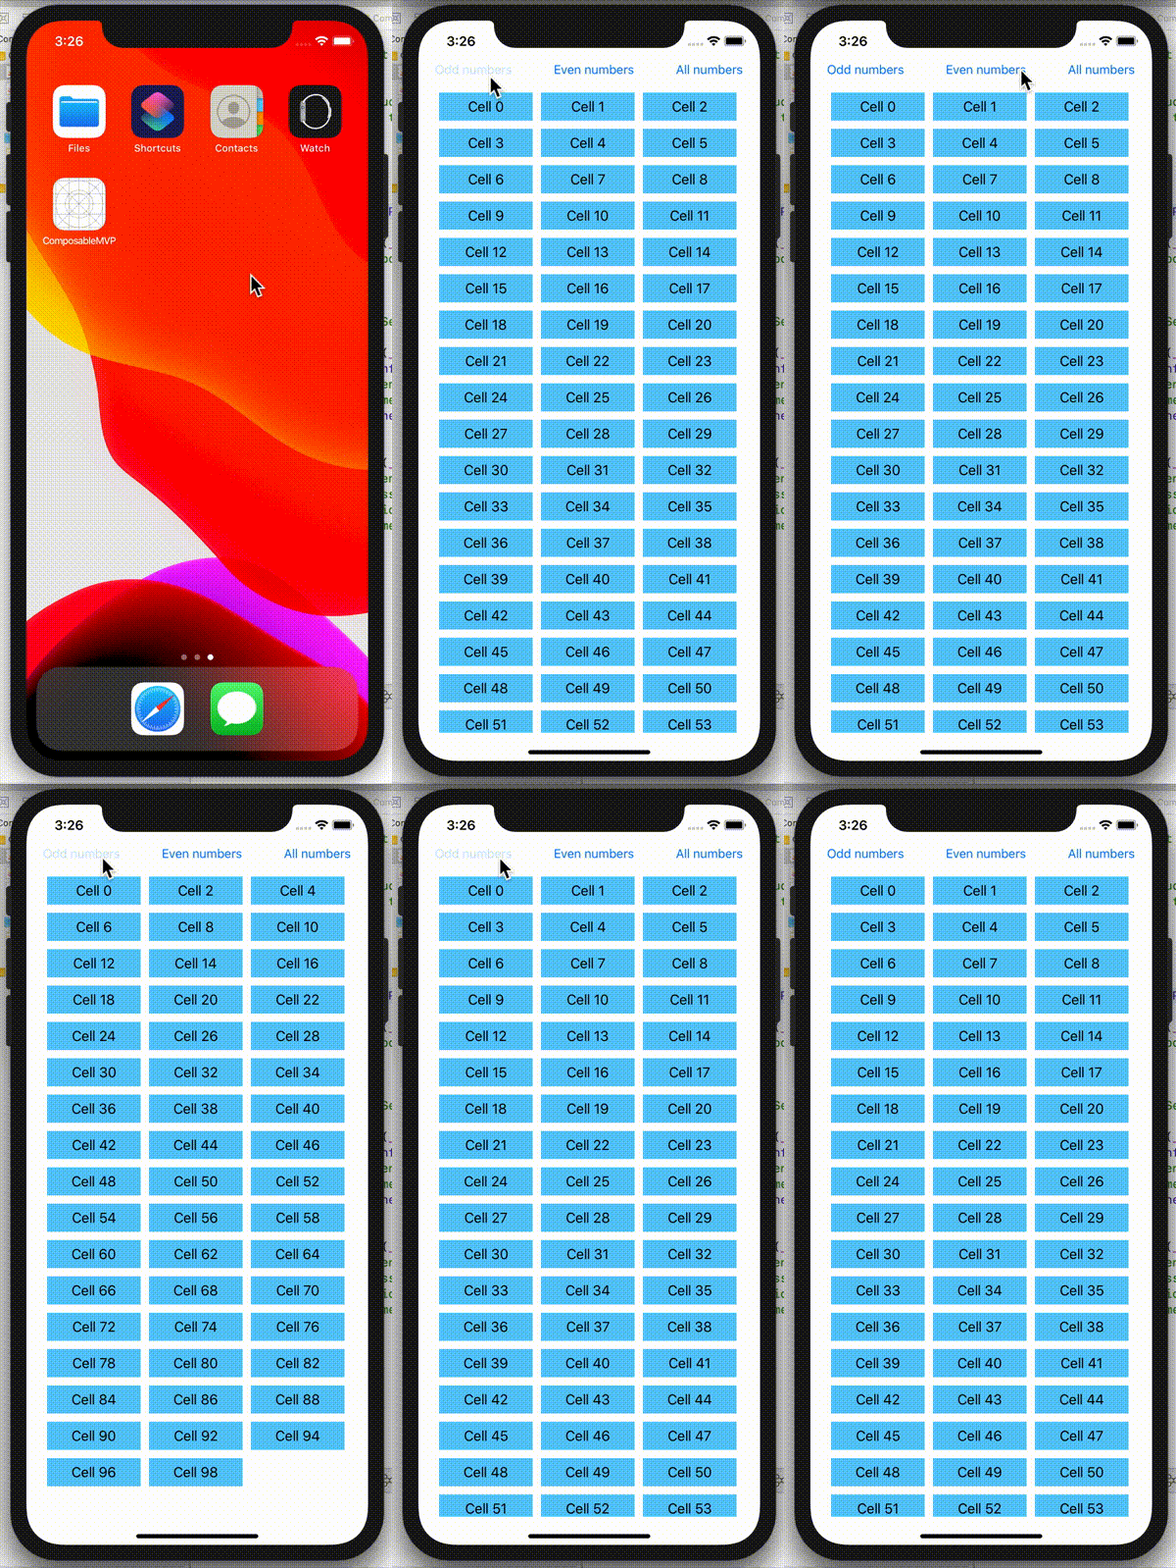
The end result will look like this:

The full code is available at https://github.com/timd/ComposableDiffableMVP
Setting up the UI
Start by creating a new single view app iOS project (File -> New -> Project -> Single View App).
Adding buttons
To demonstrate the effect of changes in the underlying data, we’ll add three buttons to trigger filtering the data and applying the changes to the collection view.
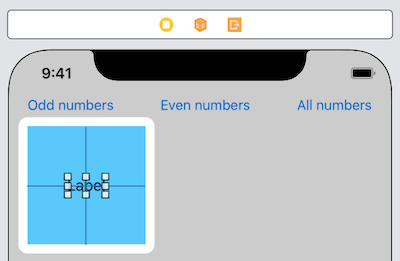
At the top of the screen, add a horizontal stack view with constraints to hold it to the top, leading and trailing edges. Set the height to 44pt. Then add three buttons, so that the stack view looks like this:

Linking the buttons
Switch to the view controller class, and add an extension with three stub @IBAction functions:
extension ViewController {

    @IBAction func didTapOddButton(sender: UIButton) {
    }

    @IBAction func didTapEvenButton(sender: UIButton) {
    }

    @IBAction func didTapResetButton(sender: UIButton) {
    }
}
Then switch back to the Storyboard and connect each button to its corresponding action.
Adding the collection view.
In the Storyboard, drag a UICollectionView object into the View Controller, and set the AutoLayout constraints so that it aligns to the stack view and fills the screen.
Now switch to the ViewController.swift class and add an IBOutlet for the collection view:
@IBOutlet var collectionView: UICollectionView!Switch back to the Storyboard and drag out the connection between the outlet and the collection view itself.
Now you’ll need to drag a label into the prototype cell and add constraints to centre it horizontally and vertically. Give the label a tag value of 1000. Then give the cell an identifier of CVCell. Finally change the cell’s background color to something other than white. When finished it should look something like this:

Setting up the layout
With the collection view in place, it’s time to create the layout
To do this, we’ll create a function that constructs an UICollectionViewCompositionalLayout and applies it to the collection view. The compositional layout follows the principle of ‘build complicated things from easier things’, and defines the layout in terms of items, groups, sections and finally the layout.
We start at the ‘bottom’ of the stack and build up to the full layout - this is the complete function:
func configureLayout() {

    let itemSize = NSCollectionLayoutSize(widthDimension: .fractionalWidth(0.33),
                     heightDimension: .fractionalHeight(1.0))

    let item = NSCollectionLayoutItem(layoutSize: itemSize)

    item.contentInsets = NSDirectionalEdgeInsets(top: 5, leading: 5,
                                                  bottom: 5, trailing: 5)

    let groupSize = NSCollectionLayoutSize(widthDimension: .fractionalWidth(1.0),
                      heightDimension: .absolute(44.0))

    let group = NSCollectionLayoutGroup.horizontal(layoutSize: groupSize, subitems: [item])

    let section = NSCollectionLayoutSection(group: group)

    let layout = UICollectionViewCompositionalLayout(section: section)

    collectionView.collectionViewLayout = layout

}
We start by defining a size for each item. This is expressed as an NSCollectionLayoutSize with two dimensions, horizontal and vertical. Because we want a grid-stle layout with three columns, we’ll tell the item to be 33% of the width of its containing group element, and use the full height available:
let itemSize = NSCollectionLayoutSize(widthDimension: .fractionalWidth(0.33),
                 heightDimension: .fractionalHeight(1.0))
Let’s also inset each content item a bit, to create a border effect:
item.contentInsets = NSDirectionalEdgeInsets(top: 5, leading: 5, bottom: 5, trailing: 5)Then we create an NSCollectionLayoutItem with the size:
let item = NSCollectionLayoutItem(layoutSize: itemSize)That’s it for items. Onto the group:
let groupSize = NSCollectionLayoutSize(widthDimension: .fractionalWidth(1.0),
                  heightDimension: .absolute(44))
Here we’re telling the group to fill the full width that it’s got available, and set a fixed height of 44 points.
With a group size, we can now create the group and give it the item that we created earlier:
let group = NSCollectionLayoutGroup.horizontal(layoutSize: groupSize, subitems: [item])Next, the section. For this we don’t need to set a size - we just create a section and hand it the group:
let section = NSCollectionLayoutSection(group: group)And now that we have an item inside a group inside a section, it’s time to take the final step and create the layout itself:
let layout = UICollectionViewCompositionalLayout(section: section)With a completed layout, we can apply it to the collection view:
collectionView.collectionViewLayout = layoutThere’s one last step - calling this function. We’ll do that in the viewDidLoad function so that the collection view is configured before it’s displayed for the first time:
configureLayout()Configuring the collection view
Now comes the heavy(ish) lifting.
First, add a property to the class for the dataSource so it can be referenced from the various places that will be needed:
var dataSource: UICollectionViewDiffableDataSource<Section, Int>! = nil;The two parameters indicate how the sections and items are modelled - we’re using our Section struct for the sections, and an Int for the items.
Now add a function to the view controller to set up the data source which will feed the collection view with data, and create the collection view’s cells:
func configureCollectionView() {

    // Setup datasource
    dataSource = UICollectionViewDiffableDataSource<Section, Int>(
        collectionView: collectionView,
        cellProvider: { (collectionView: UICollectionView,
                         indexPath: IndexPath,
                         identifier: Int) -> UICollectionViewCell? in

                         let cell = collectionView.dequeueReusableCell(
                             withReuseIdentifier: "CVCell", for: indexPath) as
                               UICollectionViewCell

                         guard let cellLabel = cell.viewWithTag(1000) as? UILabel
                           else { fatalError("Can't access label") }

                         cellLabel.text = "Cell \(identifier)"

                         return cell;
                      }
    )

    setupInitialData(animation: false)

}
Let’s unpack this.
The collection view needs a data source, so we’ll use an instance of UICollectionViewDiffableDataSource. That needs you to define how sections and items are identified, and takes the collection view as a parameter.
Then using those three parameters, it vends a cell from the table view and allows you to configure it in the trailing cellProvider closure:
let cell = collectionView.dequeueReusableCell(withReuseIdentifier: "CVCell", for: indexPath)
             as UICollectionViewCell
Using the tag value, we grab the label from the cell (or blow up if something goes wrong):
guard let cellLabel = cell.viewWithTag(1000) as? UILabel else {
    fatalError("Can't access label")
}
And set its text value:
cellLabel.text = "Cell \(identifier)"Then finally, the cell can be returned.
return cellIf you’re using to seeing the cellForItemAtIndexPath function, that’s exactly what this closure does, but integrating into the creation of the dataSource rather than being a separate delegate function.
Finally, call this function in the viewDidLoad function after the call to configureLayout:
configureCollectionView()Setting up the data structure
The next step is to set up the data structure that will be represented by the collection view, and defining how we want to handle mutating the data.
Modelling the data
First, we’ll need a way of modeling the sections. There’s only one in this case, so we’ll define a struct that holds a single value. Add this to the top of the view controller:
class ViewController: UIViewController {

    enum Section {
        case main
    }

    ...
If you had a more complex data structure composed of several sections, the struct becomes a neatly-readable way of describing the data - keys like main make a lot more sense than a 0 when you’re reading the code.
Next, we need the actual data to display. This being a simple example, an array of Ints will do. This won’t get mutated, so we can add this with let underneath the Section enum:
let items = Array(0..<99)That gives us an array of 100 Int values to play with.
Manipulating the data with snapshots
To manipulate the data underlying the collection view, we’re going to use snapshots. The process has four stages:
- update the data in some way - for example, by filtering it with a search term to create a set of results
- create a
snapshotobject - append the updated data to the
snapshot - apply the snapshot to the
dataSource
The dataSource (which is connected to the collection view, remember) figures out how the data has changed, how the collection view needs to be updated, and (optionally) how to animate the changes. All this is done for us, which saves an incredible amount of work.
Because we’re going to need to do this repeatedly, we’ll extract this functionality out into a separate function:
func updateData(items: Array<Int>, withAnimation: Bool) {
    var snapshot = NSDiffableDataSourceSnapshot<Section, Int>()
    snapshot.appendSections([.main])
    snapshot.appendItems(items)
    dataSource.apply(snapshot, animatingDifferences: withAnimation, completion: nil)
}
Unpacking this: the function takes two parameters - an array of Ints which will act as the underlying data for the snapshot, and a boolean to tell it whether the changes should be animated or not.
First, we create an instance of NSDiffableDataSourceSnapshot and tell it how to model sections and items:
var snapshot = NSDiffableDataSourceSnapshot<Section, Int>()Next, we append the single section that we’ve got:
snapshot.appendSections([.main])Append the items to the snapshot that were passed in through the items parameter:
snapshot.appendItems(items)And then finally apply the snapshot to the dataSource. The withAnimation parameter controls whether we want the changes to be animated or not; and there’s nothing to be done on completion.
dataSource.apply(snapshot, animatingDifferences: false, completion: nil)Setting up the initial data
Now that we can manipulate the data with snapshots, we can set up the initial state as the collection view is loaded. Call the updateItems function from viewDidLoad:
updateData(items: items, withAnimation: false)The withAnimation parameter can be set to false, because this data will be applied to collection view before it’s visible on-screen. Turning animations off will speed up the screen loading slightly, as well.
Running the project for the first time
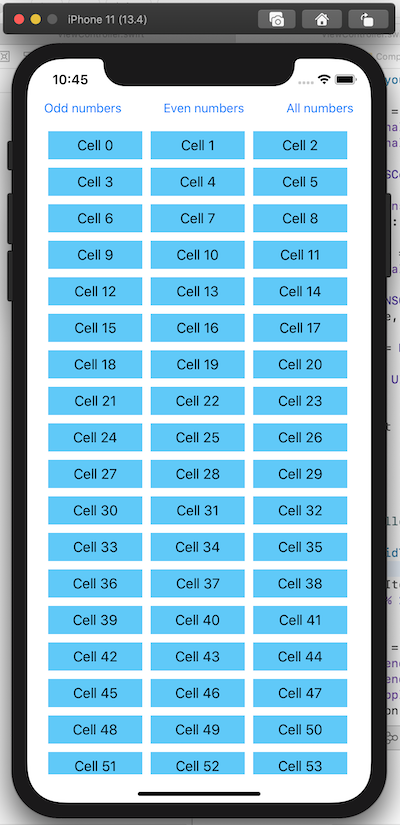
At this point, everything is wired together. We can run the project to see the collection view in its full glory:

The buttons won’t do anything yet, so this is the next step.
Making the collection view interactive
Earlier we added three buttons to manipulate the collection view to display odd, even or all numbers. That involves mutating the underlying data set and then applying it to the dataSource - which actually sounds a lot more complicated than it actually is.
Resetting the collection view to the initial state
Let’s take the simplest case first - resetting the collection view to display all the values. Because we created the items array as a property (and we don’t mutate this), we can just send that to the updateData function as-is:
@IBAction func didTapAllButton(sender: UIButton) {
    updateData(items: items, withAnimation: true)
}
Filtering the data
We need two update processes - one that results in the data containing only even numbers, and the other containing only odd numbers. Then we can apply the filtered array of numbers to the dataSource, and it will take care of updating the collection view for us.
We’ll do this in two steps: first filter, then apply using the updateData function we created earlier.
Starting with the even numbered case, update the didTapEvenButton function:
@IBAction func didTapEvenButton(sender: UIButton) {

    let filteredItems = items.filter { (element) -> Bool in
        element % 2 == 0
    }

    updateData(items: filteredItems, withAnimation: true)

}
Stepping through this, first we create a new filtered array of items to contain only the even digits, by including only items where the modulus of 2 is zero:
let filteredItems = items.filter { (element) -> Bool in
  element % 2 == 0
}
And then pass that filtered data to the updateData function:
updateData(items: filteredItems, withAnimation: true)The updateData function applies the filteredItems to the dataSource and animates the changes.
The didTapOddButton function is virtually identical, but we filter for items where the modulus of 2 is not zero:
@IBAction func didTapOddButton(sender: UIButton) {

    let filteredItems = items.filter { (element) -> Bool in
        element % 2 != 0
    }

    updateData(items: filteredItems, withAnimation: true)

}
Run the project again, and now you will be able to filter the list of items and see the changes applied dynamically with insertion and deletion animations:

Playing around
We’ve generated a 3-column grid, but it’s almost trivially easy to change this. Just play around with the widthDimension and heightDimension values in the layout, and you’ll realise how powerful and flexible the composable layouts are.
Conclusion
UICollectionView is an incredibly powerful UI component, but following the maxim of “with great power comes great responsibility” it was also complex to work with - especially if you were dealing with dynamic data. The new features makes that complexity a thing of the past.
Similarly, managing changes in the collection view’s data source was also complex and a frequent source of crashing bugs. By providing a largely automated diffing process, the new class will eliminate a whole category of bugs at source.