Creating tables with UICollectionView in iOS14
Table views have been a central part of the iOS user interface since the first version of the platform, while collection views were a much later addition. Over the last couple of iOS releases, collection views have become steadily more functional - to the point where with iOS14, UITableView is (almost) a thing of the past. They’re not officially deprecated - yet - but the writing is on the wall…
This is a walkthough of a minimum viable table view implementation using UICollectionView, as a worked example of how the more powerful user interface control can now replicate its older sibling.
The full code is available on Github.
The basic project
You’ll need to create a new iOS app, using Storyboard interfaces and the UIKit App Delegate lifecycle. The minimum requirements are Swift 5, Xcode 12 and iOS14.
Modelling the items and sections
The items that will be displayed in the table are modelled as simple structs with three properties:
struct Item: Hashable {
   var title: String
   var subtitle: String
   var image: UIImage
}
The collection view’s sections are modelled using an enum - we’ll use two sections:
enum Section {
    case main
    case second
}
View Controller properties
In the view controller, create two properties for the collection view and its data source:
 var collectionView: UICollectionView!
 var datasource: UICollectionViewDiffableDataSource<Section, Item>!
The collection view’s data
We’ll create two arrays of Items to model the data for each section. Add two computed properties to the controller:
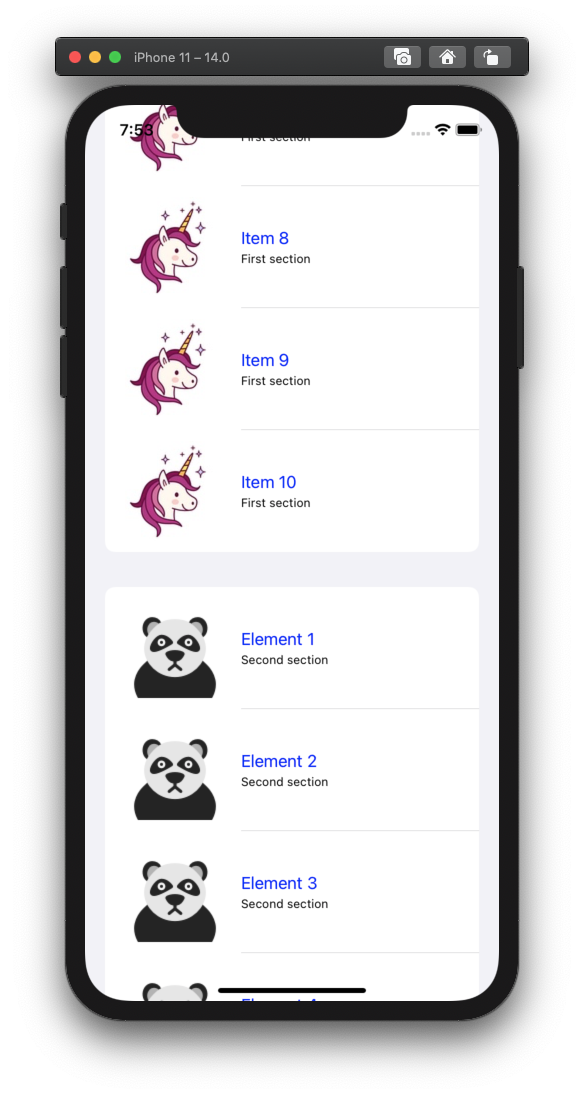
lazy var mainSectionItems = (1...10).map { index -> Item in
    return Item(title: "Item \(index)",
                subtitle: "First section",
                image: UIImage(named: "unicorn")!)
}

lazy var secondSectionItems = (1...10).map { index -> Item in
    return Item(title: "Element \(index)",
                subtitle: "Second section",
                image: UIImage(named: "panda")!)
}
Configuring the collection view layout
We’ll use the UICollectionLayoutListConfiguration layout with an insetGrouped appearance. The layout needs to be available when we configure the collection view, so we’ll add a function that returns a UICollectionViewLayout object, and call this as we set up the collection view:
private func configureLayout() -> UICollectionViewLayout {
    let config = UICollectionLayoutListConfiguration(appearance: .insetGrouped)
    return UICollectionViewCompositionalLayout.list(using: config)
}
Configuring the collection view
We’ll configure the collection view in a function that’s called from viewDidLoad. This will set constraints to fill the full screen, set the view controller class as the collection view’s delegate, and add it into the view hierarchy:
private func configureCollectionView() {
    collectionView = UICollectionView(frame: view.bounds,
                                      collectionViewLayout: self.configureLayout())
    collectionView.autoresizingMask = [.flexibleWidth, .flexibleHeight]
    collectionView.delegate = self
    view.addSubview(collectionView)
}
The collection view is instantiated with the view’s bound, and a layout generated by the configureLayout function.
Don’t forget to call configureCollectionView from viewDidLoad:
override func viewDidLoad() {
    super.viewDidLoad()
    configureCollectionView()
}
Configuring the data source
Add another function to the view controller called configureDataSource, and call this from viewDidLoad.
Configuring the data source takes place in two stages. First, we create a cell registration closure that uses a UICollectionViewListCell, and updates the cell’s content with values from the relevant Item:
let cellRegistration =
  UICollectionView.CellRegistration<UICollectionViewListCell, Item> {
      (cell, indexPath, item) in
        var content = cell.defaultContentConfiguration()
        content.text = item.title
        content.textProperties.color = UIColor.blue
        content.secondaryText = item.subtitle
        content.image = item.image
        cell.contentConfiguration = content
}
Next, we instantiate the datasource and give it a cellProvider closure. This dequeues a cell from the collection view using the cell registation closure for configuration:
datasource = UICollectionViewDiffableDataSource<Section, Item>(collectionView: collectionView,
   cellProvider: { (collectionView, indexPath, item) -> UICollectionViewCell? in
      return collectionView.dequeueConfiguredReusableCell(using: cellRegistration,
                                                            for: indexPath, item: item)
})
Setting up the data
With the datasource configured, the only step left is to apply the initial data set to it. Add a applyInitialData function to the class - this creates an instance of NSDiffableDataSourceSnapshot and appends the two sections.
Then the items are appended to the relevant section, and the snapshot is applied to the datasource.
private func applyInitialData() {
    var snapshot = NSDiffableDataSourceSnapshot<Section, Item>()
    snapshot.appendSections([.main, .second])
    snapshot.appendItems(mainSectionItems, toSection: .main)
    snapshot.appendItems(secondSectionItems, toSection: .second)
    datasource.apply(snapshot, animatingDifferences: false)
}
Call this new function from viewDidLoad:
override func viewDidLoad() {
    super.viewDidLoad()
    configureCollectionView()
    configureDataSource()
    applyInitialData()
}
The end results
Build and run the project, and you’ll see a collection view that looks and behaves exactly like a table view:

Further tweaks
The Github project also implements a stub delegate method to illustrate handling selection in the collection view.
UICollectionView can mimic different table view styles by changing the list configuration appearance. This example uses the insetGrouped appearance, but you’ve also got the option of plain and sidebar styles. If those standard styles aren’t suitable, the cellRegistration closure gives you the opportunity to completely customise the appearance of the cell.
Using these techniques, it’s possible to implement a collection view which looks and feels exactly like a table view. Given the additional features that a collection view offers, it seems reasonably likely that UITableView will be deprecated in the not-too distant future.